Understanding the Importance of a Bike Wall Mount
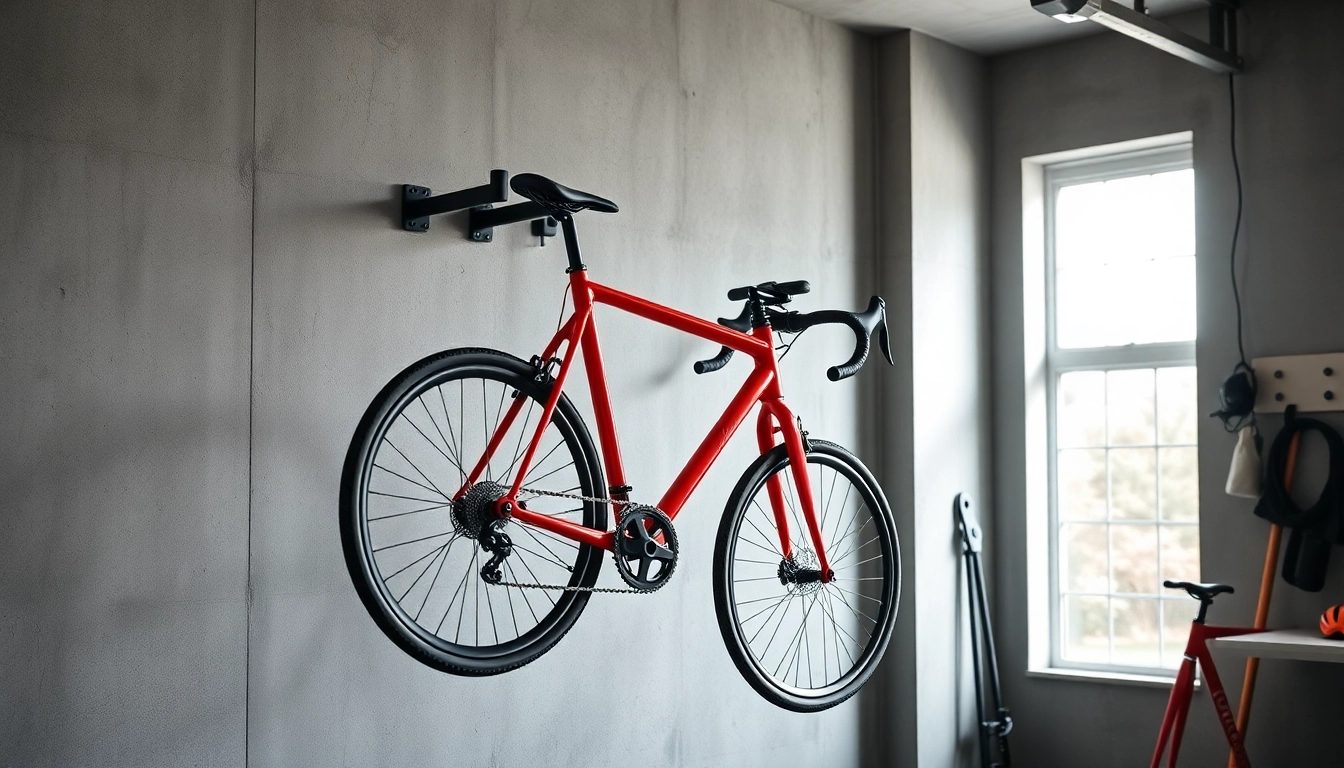
For bike enthusiasts and casual cyclists alike, finding a safe and appealing way to store a bike can often be a challenge. This is where the Bike wall mount comes into play, providing both functionality and style. Utilizing a bike wall mount not only saves precious floor space but also provides an aesthetically pleasing display of your bike, turning it into a part of your home decor. Understanding the importance of a bike wall mount can help you make an informed decision about your bike storage needs.
Benefits of Utilizing a Bike Wall Mount
The benefits of using a bike wall mount are manifold. First and foremost, it maximizes space efficiency. Instead of occupying valuable floor space, a bike can be stored vertically or horizontally on a wall, freeing up room for other purposes. Additionally, wall mounts help protect bikes from damage—by keeping them elevated and off the ground, you reduce the risk of scratches, dents, and other types of wear.
Moreover, a bike wall mount can enhance the overall look of your space. It presents the opportunity to incorporate your cycling passion into your decor, creating a focus point in your garage, entryway, or living area. A well-chosen mount complements your home’s design and showcases your bike as a piece of art rather than just a tool. Finally, securing your bike on a wall mount acts as a deterrent for potential theft, as it becomes less accessible to opportunistic thieves.
Choosing the Right Location for Your Bike Wall Mount
Establishing the right location for your bike wall mount is crucial for both practicality and design. Consider locations with ample space around them, allowing room to mount and dismount your bike comfortably. Ideally, the chosen wall should be in a dry, controlled environment to avoid exposure to moisture, which can lead to rust and deterioration.
Look for areas with adequate lighting to showcase your bike effectively. A corner may be ideal for a vertical mount, while a flat wall works well for horizontal options. If you plan to use the mount frequently, ensure it’s at a height easily accessible to you. Engaging in a little planning can significantly enhance both the functionality and visual appeal of your bike storage solution.
Factors to Consider for Bike Wall Mount Installation
When considering the installation of a bike wall mount, several critical factors need to be taken into account. First, assess the wall material. Is it drywall, concrete, or brick? Each material requires specific types of anchors and tools to ensure that your mount is secure and safe for your bike’s weight. Next, think about the weight of your bike. Different mounts have different maximum weight limits, so choose one that can safely accommodate your bike’s weight and design.
Additionally, evaluate your bike’s geometry. Some mounts work better with certain bike shapes, particularly mountain bikes versus road bikes. Furthermore, consider whether you’ll be mounting other accessories, like helmets or gear, alongside your bike. This consideration can influence your choice of mount and its placement.
Types of Bike Wall Mount Available
Horizontal vs. Vertical Bike Wall Mount Options
The primary distinction in bike wall mounts involves orientation—horizontal versus vertical. Horizontal bike wall mounts are likely best if you have limited height but more width, allowing you to store the bike parallel to the wall. Conversely, a vertical bike wall mount takes up less horizontal space, which can be advantageous in tighter settings. The choice largely hinges on your available space and personal preference, as both styles serve the fundamental purpose of secure storage.
Material Choices for Durability and Aesthetics
The material of the bike wall mount contributes significantly to its performance and aesthetics. Common materials include steel, aluminum, and high-grade plastic. Steel mounts offer robust durability and stability, ideal for heavier bikes, while aluminum is lighter and resistant to rust, making it perfect for indoor settings. High-grade plastic options provide an aesthetically flexible solution, coming in various colors and styles to complement your decor.
Consider also the finish. Powder-coated finishes not only enhance durability against elements but can offer a sleek, modern appearance. The right material will provide not just the required strength for holding your bike but can also elevate your interior style.
Adjustable and Fixed Bike Wall Mount Features
Bike wall mounts generally come in two types: adjustable and fixed. Adjustable mounts offer versatility, allowing for various bike sizes and types to be accommodated without needing to purchase multiple mounts. This feature can be especially beneficial for households with multiple cyclists or changing bikes.
On the other hand, fixed mounts are designed specifically for a certain type or size of bike, providing exceptional stability and a seamless fit. Choosing between these options may depend on the number of bikes being stored and whether your collection may grow in the future.
DIY Installation Tips for Your Bike Wall Mount
Essential Tools Needed for Installation
Before embarking on your bike wall mount installation endeavor, be sure to gather the necessary tools. You will generally need a level to ensure that the mount is perfectly horizontal; a drill and drill bits appropriate for your wall type; screws and anchors as may be specified in your mount’s instructions; and a stud finder for finding secure attachment points in your wall. A screwdriver and tape measure are also handy for positioning and adjustments.
Step-by-Step Guide to Install a Bike Wall Mount
Once you have your tools, follow these steps to install your bike wall mount:
- Mark your desired height: Place your bike against the wall to determine the optimal height for the mount.
- Locate wall studs: Use a stud finder to locate the best anchor points—installing into studs typically provides more strength.
- Measure and mark: Mark where the screws will go, ensuring they are lined up level and spaced according to the mount’s specifications.
- Drill pilot holes: Drill holes into the wall at your marked points.
- Attach the mount: Align the mount with the holes, insert anchors if necessary, and secure it with screws.
- Test the mount: Gently pull on it to make sure it is secure before hanging your bike.
Common Mistakes to Avoid During Installation
Even the simplest installation can present pitfalls. A common mistake is mounting the bike too high, making it difficult to lift or lower. Additionally, ensure that you accurately find and mount into wall studs whenever possible—using drywall alone may not hold the weight. Neglecting to read the manufacturer’s specifications can also lead to improper installation. Lastly, taking incomplete measurements can complicate the whole process. Careful preparation can help you avoid these errors.
Maximizing Space with Clever Bike Wall Mount Designs
Creative Ways to Display Your Bike Using Wall Mounts
Display your bike as a centerpiece in your home using creative wall mount designs. From artistic configurations where your bike doubles as a piece of wall art to mounts that integrate lighting, there are numerous inventive options. Consider wall mounts that allow you to pivot or swing the bike away for easy access while displaying it beautifully when not in use. Using multiple mounts can create a gallery-effect display, where bikes can be showcased in a formation rather than simply stored.
Integrating the Bike Wall Mount into Your Home Decor
Integrating your bike wall mount into home decor requires a thoughtful approach. Choose mounts that align with your home’s style, opting for materials and colors that complement existing decor. For instance, if your interior features rustic wood designs, select mounts with wood finishes. In a modern space, sleek metal wall mounts would fit perfectly. To create visual interest, consider painting or decorating wall sections where the mount will be installed to enhance your bike’s aesthetic appeal.
Combining Storage Solutions with Your Bike Wall Mount
Consider mounting accessories to optimize your space further. This might include shelves above or below the bike for storing helmets, gear, or even decorative items. Lockers can be integrated into bike storage areas to store shoes and biking accessories, while hooks can hang other sporting equipment. A well-planned bike wall will not only maximize storage solutions but enable a comprehensive display of cycling essentials.
Maintenance and Care for Your Bike Wall Mount
Regular Checks and Maintenance Routines
Like all household items, your bike wall mount requires regular maintenance to ensure longevity. Make it a routine to check your mount periodically for loose screws, wear, or signs of damage. Inspect the area around the mount for any signs of rust or corrosion, particularly if your bike is frequently exposed to moisture. Keeping these checks as part of your regular cleaning schedule can help prevent bigger issues down the line.
How to Prevent Damage to Your Bike Wall Mount
Prevention is key to maintaining the quality of your bike wall mount. Ensure proper installation, as an insecure mount can lead to accidental falls and damage. Avoid overloading the mount beyond its specified weight limit to maintain structural integrity. It’s also advisable to keep the area around the mount clutter-free to prevent accidental bumps and scratches to both your bike and mount.
When to Replace Your Bike Wall Mount
Even the most durable bike wall mounts may need replacement over time. Signs that it’s time to consider a new mount can include concentrated wear, rust, or a warped structure. Additionally, if you’ve changed bikes or want to upgrade your storage solutions, it may be beneficial to invest in a new mount that better suits your current needs. Keeping your storage solution secure and appealing ensures that you protect your bike investment effectively.